Showing posts with label Tips-Tricks. Show all posts

Tuesday, January 6, 2015

How to Disable Windows 8.1 Lock Screen (Easy Step)

  No comments    
categories: 
How to Disable Windows 8.1 Lock Screen (Easy Step)

This tutorial is for all users who don't like to be prompted with the Windows 8.1 lock screen.
One you are finished with this guide the lock screen will be permanently disabled, usless you re-enable it.

Step 1.. Editing Group Policy editor:
The First, Press the "Windows Key + R" on your keyboard to open Run window, then type gpedit.msc 
and click OK to open Group Policy Editor.
This Local Group Policy Editor is only available in the Pro version of Windows 8.1.

How to Disable Windows 8.1 Lock Screen (Easy Step)

Step 2.. In the Local Group Policy Editor go to:
Computer Configuration->Administrative Templates->control Panel->Personalization

How to Disable Windows 8.1 Lock Screen (Easy Step)

Step 3.. In right pane, double-click "Do not display the lock screen" policy and set it to "Enabled"

How to Disable Windows 8.1 Lock Screen (Easy Step)

Step 4.. Now click on Apply then OK. That's it. it'll immediately disable the lock screen in Windows 8.1
Step 5.. If you want to enable lock screen again, set the value to Not configured.

One Way

This method is for users who don't have the Pro Version of Windows 8.1
Step 1.. Press the "Windows key + R" on your keyboard to open Run window, then type regedit and click OK.
to open Registry Editor.

How to Disable Windows 8.1 Lock Screen (Easy Step)

Step 2.. In the registry Editor g to:
HKEY_LOCAL_MACHINE->SOFTWARE->Policies->Microsoft->Windows->Personalization

How to Disable Windows 8.1 Lock Screen (Easy Step)

Friday, December 26, 2014

You sould KNOW!!! What is USB or Univesal Serial Bus?

  No comments    
categories: 
You sould KNOW!!!  What is USB or Univesal Serial Bus?

Everyone has used at least once a device that was connected to another device with the help of a USB port. Whether we are talking about flash
memory sticks or other peripherals like printers, many device are using the USB standard connector. In this article we will share what USB stands for,
What it does what are the advantages and disadvantages of using USB to connect device.

What Does USB Mean?
USB stands for Universal Serial Bus and it is a term that defines cables, connectors and communications protocols used in communication between devices.
It was  designed in 1996 by a group of seven companies that included Microsoft, Compag, IBM, Intel, DEC, NEC and Nortel. It
purpose was to standardize the connection between peripheral devices like printers, Keyboards, mice and personal computers.
You sould KNOW!!!  What is USB or Univesal Serial Bus?

These companies wanted to replace the multitude of connectors that were used back then,
removing problems like the usability issues of existing interfacs and simplifying the software configuration of all devices
that were connected via USB, as well as permitting greater data transfer rates between devices.

USB has become a very successful standard and it is now used by many devices in the world.
Today there is no computer that's manufactured without at least on USB port.

Types of USB Connectors
the are two USB standard plugs: Standard A and Standard B. they are show in the diagram below.
You sould KNOW!!!  What is USB or Univesal Serial Bus?
If you haven't realized yet, the USB connector is an electronic device, so like any other electronic device it needs electrical energy to operate.
It receives energy through pins 1 and 4, and the data is transferred through pins 2 and 3.

Nowadays, almost any device you can buy can be connected to a personal computer via the USB interface, whether it is a keyboard, mouse, smartphone,
Pinter or something else, Even a device that's designed and built by you can be connected with your computer. Also, the USB
interface permits power supply exchanges between computers and electronic devices.
For example, this means that the battery of a smartphone will charge while the device is connected to a computer via USB.

In order to use this new technology on smaller devices like cell phones, portable game consoles or other similar devices, the Mini USB port was released in October 2000.
This connector is rated at 5.000 connect-disconnect cycles. it has been used by PDA's and early smartphones.
You sould KNOW!!!  What is USB or Univesal Serial Bus?
In 2007, the new Micro USB  was announced. The thinner micro connectors are intended to replace Mini USB in new device including Smartphones, Personal digital assistants,
and cameras. The Micro USB plug design is rated for at least 10.000 connect-disconnect cycles, which is more than the Mini USB plug design.
This plug has revolutionized the way portable devices are connected. The Micro USB was endorsed as the standard connector for data and power on mobile device and as a universal
charging solution, You can see it in the diagram below.

You sould KNOW!!!  What is USB or Univesal Serial Bus?

In order to use the speed rates of USB 3.0 on smartphones, the Micro USB 3.0 connector was created. It consists of a standard USB 2.0 Micro USB cable plug with 5 additional pins.
The Micro 3.0 receptacle is compatible with the Micro USB 2.0 plug. Samsung Galaxy Note 3was the first smartphone to include this connector. and so on !!!

You sould KNOW!!!  What is USB or Univesal Serial Bus?


USB Versions & Speed Standards

 USB Versions & Speed Standards

Monday, December 22, 2014

How to Disable Automatic restart after Windows Update

  No comments    
categories: 

If you are a Microsoft Windows User than you must have experienced that Windows ask you to Restart
your PC after a Windows Update or after installing any software for the Changes to Take effect.
Chances are you don't have any other option other ten Rebooting your PC at that time leaving your Working undone and incomplete.

Rebooting your PC is Important after Windows update so that all the Changes actually take effects.
But what if you are working on our computer and Windows Decides to show you a Pop-Up which says You need to Reboot your Pc
or Your PC will Reboot in so and so Seconds make sure to Close all Running Programs.
this irritates, so Today in this article I will be discussing Two methods to disable Automatic Restart after windows update or after installing any software.

Registry Hack to Disable Automatic Restart

In this Method We will be performing Registry hack to Disable Automatic Restart, this method works in all versions of Windows Xp/Vista/7/8.
Follow the below simple Steps Carefully.

Step 1.. Open Registry editor, to do so Press Windows + R key to open Run Dialog. then type in regedit and click on OK.
Windows may ask you for permission so click on Yes to allow.

How to Disable Automatic restart after Windows Update 

 Step 2.. Now Navigate to HKEY_LOCAL_MACHINE\SOFTWARE\Policies\Microsoft\Windows.
Here will have to Create two new keys, Right click on Windows key in registry editor, Hover on New and click on Key.
Refer to the below picture for better idea.

Step 3.. We will Name the New key as WindoswUpdate. We have Created 1 key now right click on the recently created key.
EX: WinddowUpdate hover on New and click on key. We will Name this key as AU.
Step 4.. Make sure AU key is selected, Right click no the right pane, hover on New and this time select DWORD (32-bit).
Name it as NoAutoRebootWithLoggedOnUsers.

How to Disable Automatic restart after Windows Update

Step 5.. Now the last step is to add a vlue to it, so double click on NoAutoRebootWithLoggedOnUsers and type 1 in value data box  and press OK. thats all we are done and have Disable Automatic Restart.

How to Disable Automatic restart after Windows Update

Now you may Reboot your Pc for the Changes to take place. or there is a way to make this changes to take place without Rebooting
click this out. Open Command Prompt and make sure you run it as Administrator. now enter this command "gpupdate/force" to make the
changes to talke effect immediately without rebooting it.

Disable Automatic Restart Using Group Policy


Group Policy Editor method is more user friendly, if you find the Registry hack method a bit confusing or hectic,
Feel free to try this method. Both the methods work in the same way. On the other hand, some windows User may not
have this Group Policy Option so they may go for the gegistry hack method.

Step 1.. Open Local Group Policy Editor by Pressing Windows + R key to open Run Dialog, and type in gpedit.msc.
Step 2.. Now navigate to Computer Configrration\Administartor Templates\Windows components\Windows Update in the left Panel.
Now in the right, Find and double click on "No auto-restart with logged on users for scheduled automatic update installations".
Step 3.. A new Windows will pop-up, in that choose Enable and click on OK. thats it done with this method,
Now you may restart your Pc or Use above mentioned Command for the changes to take effect without Restarting your Pc.

So using any of the above 2 methods you will not asked to Reboot your Pc by Windows. Obviously you need to reboot your Pc After windows update but that will be done when you wish to.

Wednesday, December 17, 2014

Easy Step How to Enable Hibernate In Windows 8

  No comments    
categories: 
Easy Step How to Enable Hibernate In Windows 8

How to Enable Hibernate In Windows 8

Lot of things Changed in windows 8 as Compared t windows 7. Start Screen was one of the addition to windows 8.
And couple of things have even disappeared from windows8 like start button and Hibernate Option. Probably the reason
Microsoft Disable Hibernate option is because windows 8 boots up and shuts down faster then the older versions. but if you wish to enable hibernate in windows 8 the continue reading.

What is Hibernate?

Before Moving forward let us have a short explanation about what Hibernate actually is.
Hibernate is powering down a computer while retaining its state. upon hibernate, the computer saves the contents of its random access memory (RAM) to a hard disk
or other non-volatile storage. upon resumption, the computer is exactly as it was upon entering hibernation. When used to save
power, hibernation is similar to sleep mode and saves more power at the cost of slower resumption.

Steps To Enable Hibernate In windows 8

Hibernate option is actually Hidden in windows 8, We can easily unhidden it and enable it. just follow the below simple steps to enable hibernate in windows 8.
Step 1.. Press win + w key then type "Power", windows will show you few results, you have to click on "Power Option"
Step 2.. Now From the left Pane, click on choose what the power button do.
Easy Step How to Enable Hibernate In Windows 8


Step 3.. then on Next screen click on change setting that are currently unavailable.
Step 4.. Now Scroll down to "Shutdown setting" section, and check Hibernate box to enable it andclick on save changes.

Step 5.. Everything is done, Now next time whenever you need to Hibernate your PC, just Move your mouse pointer to right corner of your screen to show up charm screen, click on setting->power

You will notice Hibernate option added there. so in this tutorial we saw what Hibernate is and how to enable Hibernate in windows 8, Hope this helps you.

Monday, December 15, 2014

How to hide Drives with CMD

  No comments    
categories: 
How to hide Drives with CMD

Hi!! today I will write a tutorial to hide drives with CMD without any third party package. There are several free and due
software's accessible to hide local drives, however I am not gonna mention to hide a local drive employing a package.
In this tutorial I will show you an easiest method to hide native drive with CMD. This may save your each cash and time.

How to Hide Drives with CMD?

Step 1.. Click on Start->Run, if you are using windows 8, Then click on start and search for RUN, or just hold down windows Key + R
Step 2.. Run box will appear, kindly type "CMD" and hit enter.
Step 3.. Now you will see command prompt windows, Thpe "Diskpart" and hit enter.
    Note:: In windows 8 I was asked to confirm if I want to allow this program to make changes to this computer, just click on yes and other windows will open up shortly.
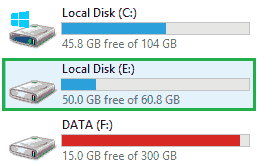
Step 4.. Now you have to type "list Volume" and Hit enter to see the list of all drives details
Step 5.. Now I have some personal data in my driver E which I don't want any other person to open in, so I want to hide it,
for that I will type "select volume E" and hit enter.
if you wish to hide volume D, then you will type "select volume D" and hit enter. Now you can see something like below picture.
How to hide Drives with CMD

By now you have selected the Drive successfully which you want to hide. but the last part which is to hide the Drives is still remaining.
Step 6.. to Hide the drive you have to type "Remove Letter E" and hit enter.
How to I get the Drive Back?

Alright Now the only question you want me to ask is "Hey how do I get my drive back"
Let me tell you that easy as well, just follow the below simple steps

Step 1.. Scroll back up an perform Step 1,2,3,4 and 5 again.
Step 2.. OK Now you have completed the 5 steps listed above. just make sure you have completed till "Select volume E"
Step 3.. Earlier in the article to hide the drive we types "Remove letter E", Now to unhidden it we will type "Assign letter E" and hit enter.
Step 4.. Check if you have successfully got the drive back. Now just Restart your computer if you wish to.

How to I get the Drive Back?

Friday, December 12, 2014

Google Play Store Error 498 - 5 Ways to Fix it

  No comments    
categories: 
Google Play Store Error 498 - 5 Ways to Fix it

Recently while Downloading asphalt game on my smartphone I got an Error 498 in Google Play Store.
To be Exact, the Error Reads "Error 498 has occurred while communicating with the server".

I tried again but the same error again. after few tweaks I was finally able to download and install Asphalt on my phone.
because I faced this error in Google Play Store, I though there will be many other people facing the same error ans so this Guide on how to Fix Error 498 in Google Play Store.
Here on this Page I will be sharing few Methods that will help you to get rid of it. though any one listed method will not work for everyone to Get rid of Google Play Store Error 498 because there are different
reasons that are responsible to cause this error.

Causes of Error 498 in Play Store

There are few thing that causes this Error on your smartphone while you try to download any app from Google Play Store.
The most common issue is the Size of Device's Cache partition. You will get error 498 in play store if you try to download apps that are larger in size then your device's cache partition.
For eg: Your Cache partition is of 30M and you try to download an app with size 35M then you might get this error. usually Play Store have issue when downloading apps that are large in size.


Another Reason is Google Servers from where you are trying to download the apps might be under maintenance. So if you are downloading an app and you get Play Store error 498 message then
Server may be the issue. just wait and try to download it again.
So these were just Couple of possible reasons for a use to get this Error in Google Play Store, Now let us see some possible Ways to fix it.

5 Ways to Fix Google Play Store Error 498
1..Clearing Cache
Most common Reason you might be facing this error is because of cache, so I will start the Methods list by recommending you to clearing the cache.
To do so, just navigate to Settings->Applications->Manage Application->Select Google Play Store->Clear Data & Clear Cache.
Now try and download the app if cache was the problem and clearing it solved the issue for you. One more reason of listing this method on top is this worked for me and I was able to download the game
easily after clearing the cache. though the solution for all might not be the same so try below methods too.l

2..Use WiFi to Download
Many a times your Internet Service Provider (ISP) creates this problem of error 498 and many other errors.
So try and get access to wifi somehow and try to download the app that giving you the error.

3..Adding New Play Store Account
You will need to add a new Play Store account in order to fix this error.
Go to Setting->Account->Add New Account->Click on Google->Next->Enter email->Done
After setting up new Play Store Account try to download the same app and see if this have solved your problem.

4..Connecting with Computer:
One of my friend reported that he fixed error 498 by installing apps from Computer to SmartPhone.
You just need to connect your SmartPhone to Computer Using USB Cable. then go to Google Play Store using your favorite
browser on your Computer. then search for the app which was getting error on your SmartPhone.
Click on the Preferred Result that you get. next on the app page you will see install button.
Click it to download that app on your SmartPhone. No it will not install on your computer. it will install on your SmartPhone.
just make sure your Smartphone is connected or else you will not see install button.

5..Uninstall & reinstall Google Play Store:
if your Phone is Rooted then you might just want to uninstall and then reinstall Google play store so that to make sure that
you actually get rid of error 498 in Google play store. if any of the above listed methods don't work for you then to for this on and you will fix if for sure.
So these were 5 Methods to Fix Error 498 In Play Store. I hope this helps you to get rid of this error and you can again download your favorite app from play store just like before.
if these helps then please do not forget to spend few seconds and comment below which Method solved the issue for you.
or if you any other to get rid of this error message in play store then feel free to share it in comments below.

Thursday, December 11, 2014

How To Add or Change favicon on Blogger Blogspot

  No comments    
categories: 
How To Add or Change favicon on Blogger Blogspot

Favicon (favorites Icon) is the small (usually 16px X 16px in size)
you see beside some site's name in your browser's address bar.
having your own favicon with a nice graphical reminder of your site beside is a good way to get visitors attention.
Blogger users can add a custom favicon for their blogs going to the layout section and by clicking on the Edit on the "Favicon" element.

"for many bloggers having a custom favicon (the tiny image displayed in your browser's window or tab) is the finihing touch that ties together the design and identity of a great looking blog Today, we're pleased to announce that Blogger in Draft users can now add a customized favicon to their blog. Blogger in Draft"

How To Add A Favicon To Your Blogger Blog

1.. Log in to your blogger's Dashboard, go to the layout and click on Edit
2..A popup windows will open where you can search for an image in your hard drive to replace the default favicon image.click on "Browse" button and search for your favicon then click on "save


before:

After:
it might take some time until your new favicon will appear in your Browser's tab or windows

Microsoft Visual Studio V2012: Display Line Numbers in the Text Editor

  No comments    
categories: 
Microsoft Visual Studio V2012: Display Line Numbers in the Text Editor

By default, line numbers are not visible in Microsoft Visual Studio's Text Editor. This is a disadvantage which may make it difficult for developers to navigate, track, and jump to a specific line in a long script. This tutorial will help you enable this feature easily.

Before I use a new script editor, I always make sure it is set to display line numbers. Although most script
editor have this ability, many of them do not enable it by default.
Here are the required steps in Microsoft Visual Studio v2012.

1-> Launch Microsoft Visual Studio v2012.
2-> From the toolbar, choose Tools--> Options


3-> When the Options windows pops up on the screen, it will be display in minimal mode, with most of the important setting
hidden by default.
4-> From the left side hierarchy, navigate to the Text Editor--> The current language that you are using.
In this example, I am using Visual Basic. If you want to enable this option for all language, choose All Languages.
5-> On the right side of the windows, find the Display section, and check the Line numbers option.
6-> Click the OK button to save the setting


7-> From now on, the Text Editor will display the line number at the beginning of each line.

Before:


After:


Wednesday, December 10, 2014

Google Chrome: Disable Save Password feature

  No comments    
categories: 
Google Chrome: Disable Save Password feature

Google Chrome is quick, convenient, and secure. However, its at protection setting are in great need of improvement.
Google Chrome offers a feature to save the username and password combination for
various websites, so when you try to log in, Chrome will fill in your username and password details automatically.
This feature can be dangerous if you share a computer with multiple user. Someone could log in to websites with your saved
credentials, potentially unlocking your credit card in formation or bank account. Fortunately, Chrome users can use expanded user
setting to tweak the browser so that it has a higher degree of security.

You can increase the security of Chrome by choosing whether or not you want to save usernames and passwords.
1.. Click on the master Chrome setting button at the top-right.
2.. Select Setting.
3.. in the search box, type mange password.
4.. Click on the Manage Password link, and delete the exiting sites with saved passwords.


Follow by Picture below


Tuesday, December 9, 2014

Google Chrome: Put the Home Button on the Toolbar

  No comments    
categories: 
Google Chrome: Put the Home Button on the Toolbar

Google's Chrome browser gives you the the option whether or not you want a button on th toolbar to bring you back to your homepages.
Here is how to add (or remove) the home button from the browser's toolbar

I am frequently asked "where is my home button?" by new Chrome users.
Traditionally, all web browsers have had a Home button that when pressed takes the user back to their set homepage. 
However, as most users have gotten away from using homepage, the Home button is slowly being removed from browsers to simplify the toolbar.
Here are the steps for getting if back.

1.. Open Google Chrome
2.. Click the three horizontal lines icon in the upper-right corner of the toolbar and select setting.


3..Under the Appearances section and check the Show Home button check-box.


Immediately, when you check or unchecked the setting, the Home button will appear (or disappear) from the toolbar.
The methods for placing and removing the home button have changed as Google has rolled out new versions of the Chrome browser.
If this tutorial does not work for you, please be sure yo have updated to the lasted version.
If you are running the latest version, just drop us a note in the comments. we'll be glad to update the tutorial again.

Turn Off Automatic Spell Check in Notepad++ Editor

  No comments    
categories: ,
Turn Off Automatic Spell Check in Notepad++ Editor


Notepad++ is the editor that programmers most widely use because it is fast, lightweight, and filled with
tons of useful features and plugins. Recently, Notepad++ added a built-in plugin for automatic spell checking.
Unfortunately, This new feature can be annoying to some as it shows a re mark under most programming language keyword,
under some words related specifically to the web, and under html tags.
Here is how to turn it off.

Turn off automatic spell check in Notepad++ Editor
1.. Navigate to the plugin on the menu bar list.
2.. Go to DSpellCheck plugin, and unchecked the Spell Check Document Automatically
or You can directly turn of spell check using the keyboard shortcut Alt+A


Before (Showing Red Marks Under Spelling Errors)


After (Spell Check Disable)


Free Soft Here Notepad++ 6.6

Monday, December 8, 2014

How to Create Run Commands in Windows

  No comments    
categories: 
How to Create Run Commands in Windows


There is no doubt that Microsoft Windows in the most widely used Operating System in all parts of the world.
a part from being simple to use. it is quite rich in features as well, which makes our lives quite easy.

The Run Command available on windows Operating System is one such power packed feature that lets you to open a document or
an application instantly with the help of just 1 Command. So rather than clicking several icon or using multiple commands, 
you can use the Run command to open any program or document instantly.
For that you will need to Create Run Commands for any software of your choice which you use Frequently.

But, do you know how to Create Run Commands of your Own? Well, it is really easy, which involves just few steps.
Through this article, I will show you to understand how to access your favorite applications by creating Custom Run Command.

Open Run Command:

Before I show you how to create your Own Run Commands, let's take a quick look on how to Open Run Command.
First of all, you need to open the Run windows by just pressing the windows key along with the R Key. I.E Windows+R.
Now, you have to type the name of the program that you desire to open up or execute.
Unfortunately, not all programs can be accessed through this method. So let me show you how to Create Run Commands that do not come as inbuilt commands.

Step to Create Run Commands of your Own

Step 1:
The first step is to select the software or application for which you want to make custom Run Command.
For example, let us consider Mozilla Firefox as the example here. Remember, you can choose any application other than which is already there in the Run Command.

Step 2:
In the second step, right click on the desktop of your computer system and make a new shortcut.
Right click->New->Shortcut


Step 3:
As you select the Shortcut option in the 2nd step. it will open up a dialog box, and the dialog box
will ask you path of the application or software for which you want to create the Run command.

Step 4:
Now, you need to browse through the files and choose the one that shows "Mozilla Firefox.exe". well, it is quite obvious that all
the executable files can be found in the C Drive (or wherever the Operating System has bee installed). 
inside the folder "C:\Program Files (x86)". For Example "C:\Program Files (x86)\Mozilla Firefox"


Step 5:
Once you are done with step number 4, just click on "Next" button and simply provide a relative name to that shortcut. 
Remember, the same name will be used later in the Run Command.

For example "MF" for Mozilla Firefox

Step 6:
Now click on the "Finish" button. Once it it once, an icon related to that application or software will show u on our computer's screen.
it means that the process of creating shortcut has been done successfully.


Step 7:
In this step, just cut and paste that recently made shortcut icon into your computer's root drive in its Windows folder.
For example: "C:\Windows", Make sure you are the  administrator of the computer of the have its password.

Step 8:
Now you are done with the set up and can run the application through Run Command. just to to Run and enter the Keyword "That you give it when you created" for example: "MF" for Mozilla Firefox
and Mozilla Firefox will begin executing


So this was a shortcut useful Tutorial to Create Run Commands for any software in Windows,
I hope this Post will ease-up on work, Stay tuned and subscribe to this blog to receive update everything a New article is posted.
Subscribe Box.

Wednesday, November 26, 2014

How to Enable Copy paste in CMD-Windows

  No comments    
categories: 

How to Enable Copy paste in CMD-Windows
By Default windows do not allow users to copy text and paste it in Command Prompt Or copy text
from Command Prompt and paste it elsewhere. But there is an option in CMD itself to enable Copy and
Paste text in windows Command Prompt.
Today in this tutorial we will learn how to Enable Copying and Pasting Text in Windows Command Prompt.
One of the main advantage of this will be that you can copy any command that you find on the internet or from any world/excel file
and paste it directly in CMD execute that command just like that.

How to Enable Copy Paste in CMD

Step 1. Open CMD, just type CMD in search or Press win + R key and type CMD to open Command Prompt.


Step 2. Right click on the title of the CMD windows and select Properties just like its shown in the Below Picture.


Step 3. You will see a Pop up Windows coming up, Now on the Right hand side, Under Edit Options, just check Quick Edit Mode and click OK


Step 4. Everything is Done, Now just Copy any Text from Here or anywhere else Using CTRL + C keys and just Right click using your mouse on CMD.
You will see that text is been pasted automatically in CMD. Please Understand that using CTRL + C  to copy text is important.


Likewise if you wish to copy text from CMD to paste elsewhere then just select the text in  CMD and
Again just Right click with the mouse. your text is copied and ready to paste it in any document you want.

This doesn't limit you to just text you can even copy file or folder path and paste it in CMD.
Everything that you have to type manually can be copied from somewhere and pasted directly to CMD with this small tweak.
So this was just a small tip I want to share with my readers so that don't have to type any long command in CMD wcich if typed incorrectly can cause errors.
I hope this will some of you.